Being able to access more memory, processing, and storage on the fly is a great resource to have in your back pocket in case you’re ever in a situation where you need it. Launching an EC2 cluster with extra computing power can be pretty easy. Amazon has a well-detailed guide for its EC2 offerings here. I highly recommend spending a couple hours of your evening or weekend getting used to how to do it.
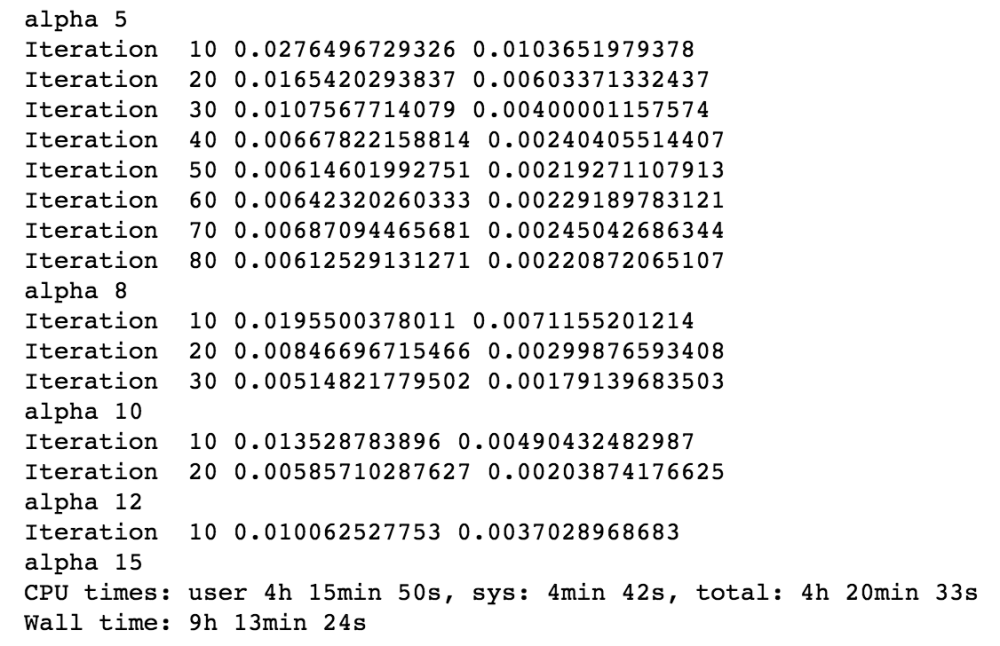
If you’re like me, you like working in Notebook and want the flexibility of working in “the cloud”. So why not take your Notebook for a spin in the cloud? Plugging your Notebook into a powerful cluster can save you a ton of time. I recently ran some machine learning algorithms that were taking hours on my new Macbook Pro. Running the same code on a large cluster took less than an hour:

If you want to try this for yourself, luckily there’s some good documentation out there. So this will be a short post where I’ll just point you to some good resources and include some reminders.
I’m going to assume you already know how to fire up an instance and log into it via SSH (see the link to the EC2 guide above!).
Save yourself some time and launch an instance that already has Anaconda installed. You can use the search function in the Community AMI section of EC2. Here’s a list of the Anaconda instances. The steps below are for Jupyter.
Now follow all the steps here up until “Firewall Setup”. A couple of tips:
- To create the password, you can launch a Python console by typing “ipython” at the command line.
- Don’t forget to copy/paste the SHA1 hash of the password in a handy location so you can edit the config file conveniently.
- You’ll be prompted to answer some questions when you create your SSL certificate. You can leave the fields blank or fill out as you wish:

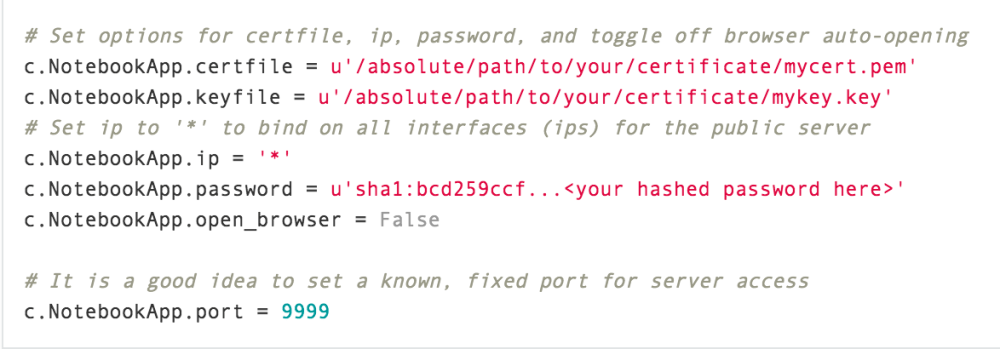
- Don’t forget the vim commands to edit the config file you created: “a” (or “i”) to start editing, “Esc” to escape editing, and “:wq” to save. Here’s a reference. Copy and paste the skeleton code for the config file from the step above into your config file to save some time:
-
Example from documentation
You’re almost done. Don’t forget this next important step!
Since you’re now going to be interacting with EC2 through a browser, you have to make sure you enable traffic to the instance otherwise you will not be able to connect.
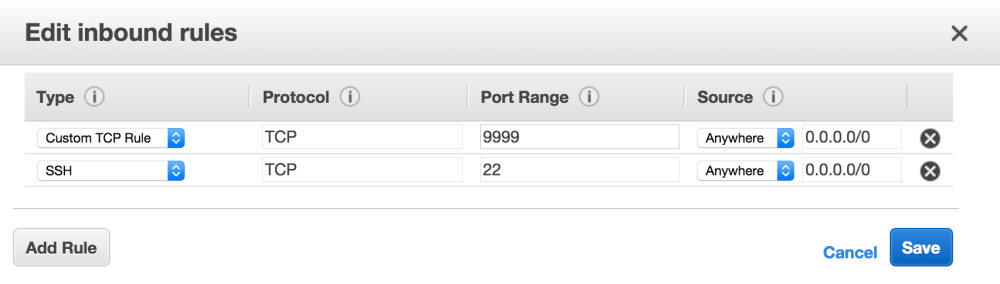
Once you save the new inbound traffic rules to your instance’s security group, launch your notebook server on the instance:
$ jupyter notebook
And then connect your browser to the notebook server using https and the EC2 public DNS and the port (9999 in the documentation) you specified in the config file:

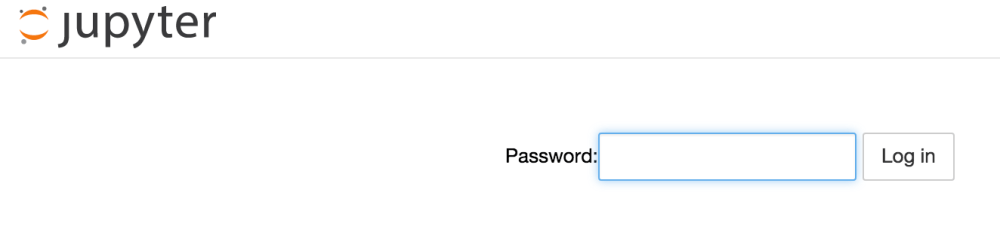
You may get a warning from your browser about the certificate. Proceed to connect and use your password (the one you typed into the console to produce the SHA1 hash) to log in:
It’s that easy. If you already have some Notebooks and data to run, you can SCP it to EC2 or use other services like FileZilla and open the Notebook and interact with the data just like you would on your local machine.
Have fun in the cloud!
